Microsoft Outlook 2003
Nachdem Sie diese Dokumentation gelesen haben können Sie:
- Ein Outlook Konto einrichten
- In Outlook 2003 bei einem IMAP-Konto Mails löschen
Einrichten eines Konto in Outlook 2003
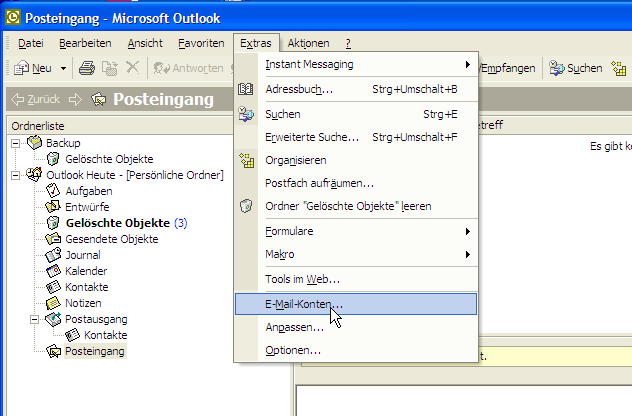
Starten Sie das Programm Outlook und wählen Sie den Menüpunkt “Extras” -> “E-Mail-Konten” aus.
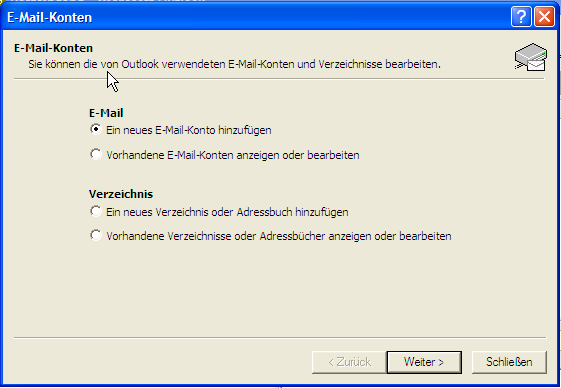
Wählen Sie “Ein neues E-Mail-Konto hinzufügen” aus und klicken Sie auf “Weiter”
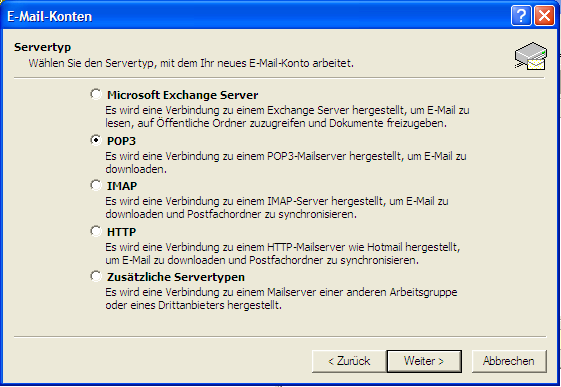
Unabhängig vom Servertyp tragen Sie als Posteingangsserver pop.intertech.de ein:
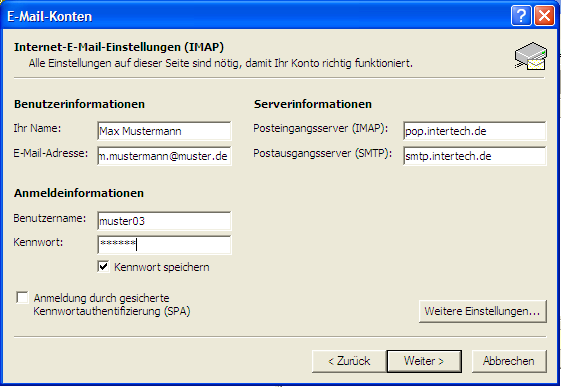
Klicken Sie als nächstes auf die Schaltfläche “Weitere Einstellungen…”.
Klicken Sie im nun erscheinenden Fenster auf den Reiter “Postausgangsserver” und aktivieren Sie den Punkt “Der Postausgangsserver (SMTP) erforder Authentifizierung”. Es gelten die gleichen Einstellungen wie beim Posteingangsserver.

Speichern Sie nun Ihre Einstellungen mit einem Klick auf die Schlatfläche “OK” und beenden Sie die Einrichtung durch Klicks auf die Schaltflächen “Weiter” und “Fertig stellen”.
E-Mails löschen mit Outlook 2003/IMAP
Deleting an email from your mailing account using Outlook and IMAP, leads to the message being still displays but struck through. These messages live on the server until they are “purged”, taking up space and viewable in other clients (such as webmail).
To permanently remove your deleted emails, choose Edit | Purge Deleted Messages.
To add the Purge Deleted Messages button to your Outlook toolbar:
- Choose View | Toolbars > Customize…
- Choose the Commands tab and click on the Edit Category.
- Scroll down the commands list and select Purge Deleted Messages.
Click and drag the Purge Deleted Messages button to the toolbar at the top of the screen and drop it next to the Delete button.
Your toolbar should look like:
It is possible to hide your deleted emails, but you still need to purge them to remove them permanently.
To hide these deleted emails, choose View | Arrange By > Current View > Hide Messages Marked For Deletion
“Gesendete Nachrichten” auf dem IMAP-Server speichern
Saving your Sent Items to the Sent Items folder of an IMAP account is possible directly via your account settings when you are using Outlook 2007 or Outlook 2010. Support for this does not exist in Outlook 2003 and previous, but you can still get your Sent Items on the IMAP mail server by creating a message rule.
Outlook 2010
To assign a folder as the Sent Items folder in Outlook 2010;
- Open your IMAP account settings via; File-> Account Settings-> Account Settings…-> double click on the IMAP account.
- Press the button: More Settings…
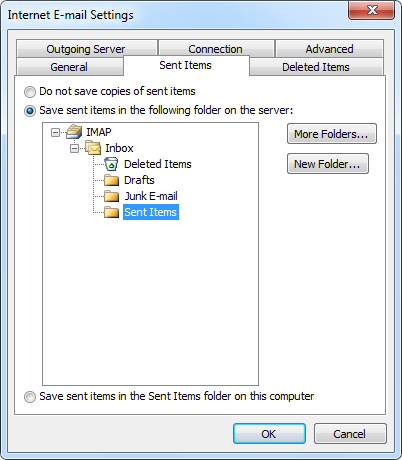
- Select the Sent Items tab.
- Enable the option “Save sent items in the following folder on the server”.
- Select the folder where you want to store the Sent Items in.
- You can press More Folders… if you do not see all your IMAP folders in the list.
- You can press New Folder… if a Sent Items folder does not yet exist on the server.
Outlook 2007
To assign a folder as the Sent Items folder in Outlook 2007;
- First make sure there is a Sent Items folder in your IMAP mailbox. #* If you have not subscribed to the Sent Items folder yet use; #* Tools-> IMAP folders… #* If no Sent Items folder exists yet choose; #* File-> New-> Folder…
- Open your IMAP account settings via;
- Tools-> Account Settings…-> double click on the IMAP account.
- press the button: More Settings…
- Select the Sent Items tab.
- Enable the option “Save sent items in the following folder on the server”.
- Select the folder where you want to store the Sent Items in.
Outlook 2003 and previous
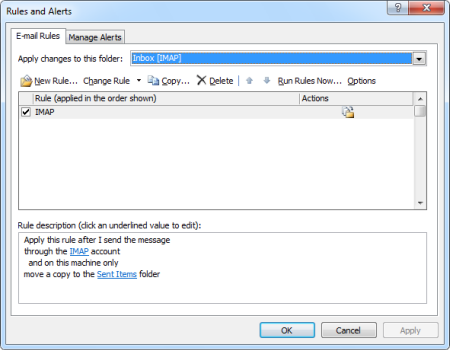
As Outlook 2003 and previous do not have support for assigning a Sent Items folder at the mail account level, we must emulate it via a message rule;
- First make sure there is a Sent Items folder in your IMAP mailbox. #* If you have not subscribed to the Sent Items folder yet use; #* Tools-> IMAP folders… #* If no Sent Items folder exists yet choose; #* File-> New-> Folder…
- Open the rules dialog via;
- Tools-> Rules and Alerts…
- If you see a dropdown list at the top, make sure it is set to the Inbox of the IMAP account.
- Click the New button to start with a new rule.
- Select the option; Start from a blank rule
- Select Check messages after sending.
- Click Next.
- Select the option; through the specified account
- Click on “specified” at the bottom of your screen and select your IMAP account.
- Click Next.
- Select the option; move a copy to the specified folder
- Click on “specified” at the bottom of your screen and select your Sent Items folder your the IMAP account.
- Click OK when you get the warning about the folder not supporting Unicode (IMAP accounts in Outlook 2003 doesn’t have support for Unicode).
- Finish.
Bemerkung
The downside of this method is that the Sent Items will be marked as unread.